Overview
Softdrive’s Computer Fleets are a dynamic pool of virtual computers designed to automatically return to their default state after a user signs out, shuts down the cloud PC, or if the PC remains idle for a preconfigured time. This non-persistent environment ensures that every session starts from the original state, helping keep the system secure, reliable, and free from residual data or configuration changes. Fleets are ideal for organizations with rotating staff or continuous shift coverage, allowing multiple users to share resources without compromising performance while reducing maintenance overhead and delivering a consistent user experience across the entire fleet.
- Create and manage fleets from the Softdrive Dashboard
- Configure idle timers for automatic disconnect or shutdown
- Dynamically scale and modify fleets as needed
- Optionally join fleets to a domain automatically
Prerequisites
- Access to the Softdrive Dashboard
- Permissions to create or manage computers or fleets
- Understanding of user workflow
Procedure
- Create a Computer Fleet
- Go to https://softnet.softdrive.co/ and log in
- Navigate to More → Fleets

- Click Create

- Configure the fleet settings:

- Name: Fleet name
- Operating System: OS selection
- GPU or CPU: Resource type
- Performance Tier: Resource profile
- Region: Host location
- Initial State: Template
- Schedule: Operating hours
Note: Schedules cannot overlap and must include at least a 1-hour gap. - Set the number of computers

- Click Create Fleet
- Manage Computer Fleets
All fleets can be viewed and managed from the dashboard.
- Edit templates and configurations
- Adjust performance tiers
- Assign users
- Configure idle timers

- Turn machines on or off
- Delete computers

- Delete a Computer Fleets
All computers must be removed before deleting a fleet. 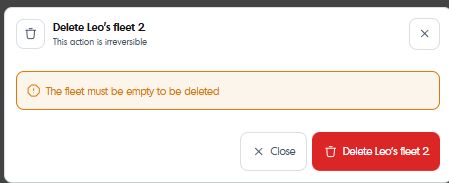
- Access Fleets from the Softdrive App
Users can claim available machines directly from the Softdrive application.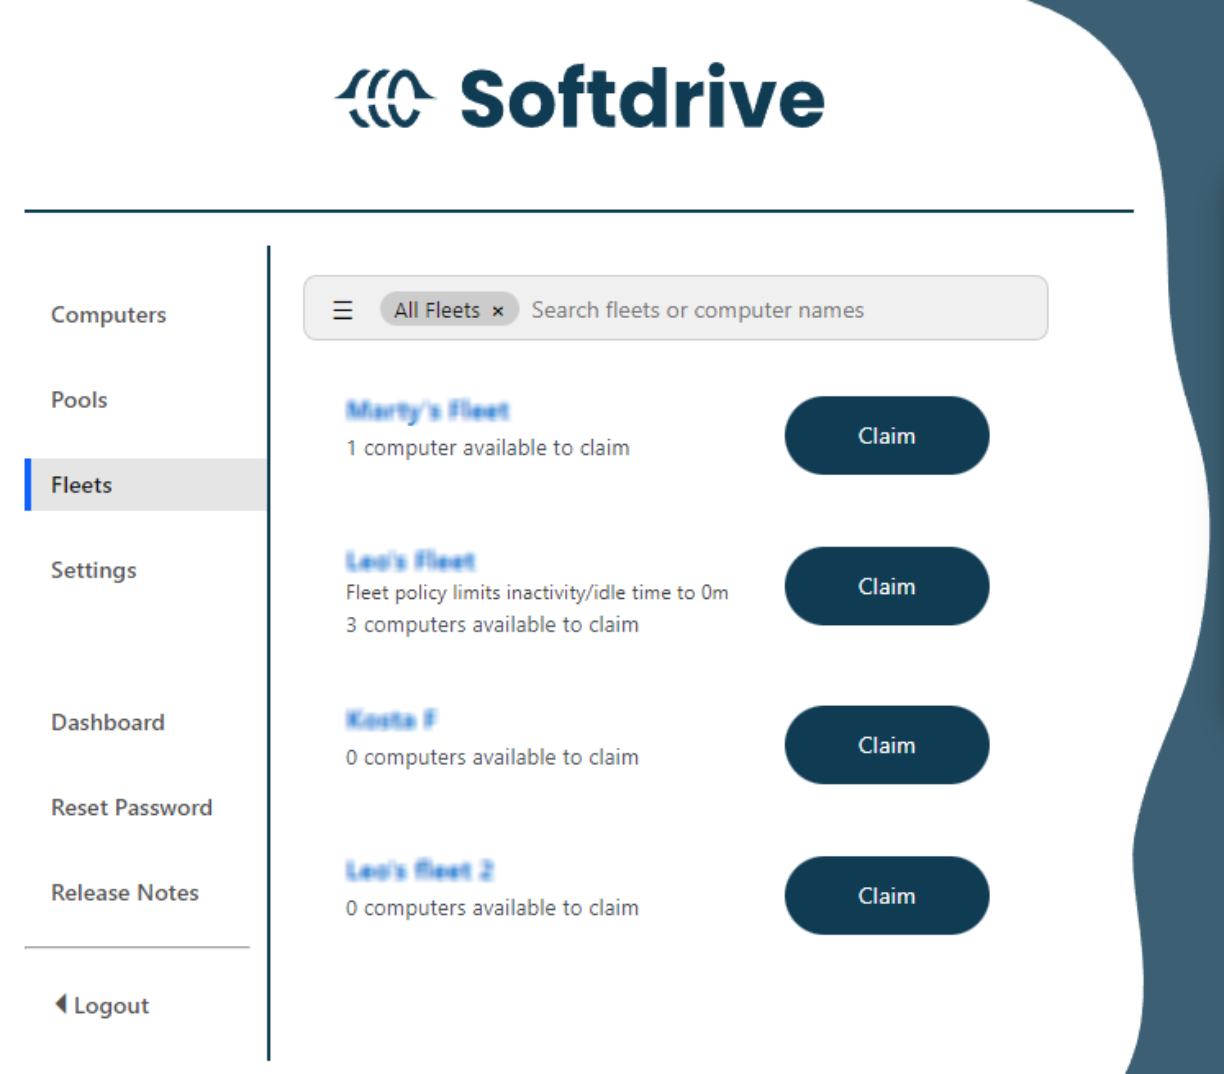
- View available machines
- Click Claim to start
Machines automatically return to the pool after logout or shutdown.
When to Use Fleets vs Regular PCs
Use Fleets for shared, non-persistent environments and Regular PCs for dedicated, persistent workstations.
| Feature | Fleets | Regular PCs |
|---|---|---|
| Persistence | Non-persistent | Persistent |
| Users | Shared | Dedicated |
| Use Case | Shifts / labs | Daily work |
Real-World Examples
- Call Centers: Fleets for shared access
- Training Labs: Clean environment each session
- Engineering Firms: Regular PCs for persistent work
- Remote Workers: Dedicated machines