Overview
Some users may experience an issue where the Windows Snipping Tool is not functioning properly inside a Softdrive virtual machine.
This issue is typically related to the active encoder configuration used by the Softdrive client.
Applies To
- Softdrive Virtual Machines
- Windows 10 / Windows 11
- Users experiencing Snipping Tool issues
Prerequisites
- Active Softdrive session
- Access to the Softdrive overlay menu
- Permission to modify Softdrive settings
Procedure
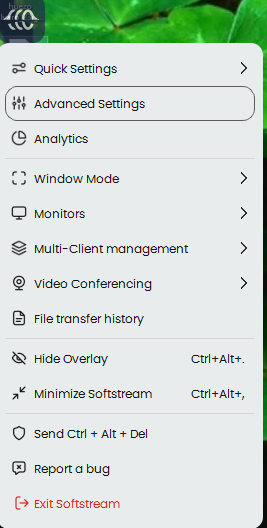
- Open Advanced Settings
- Open the Softdrive overlay menu
- Select Advanced Settings
- Create a New View Setting
- Click ADD to create a new configuration profile
- Name the new profile (example: View1)
- Change Encoder Type
- Set Encoder Type to:
Software (Beta)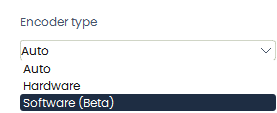
- Set Encoder Type to:
- Apply the Configuration
- Click APPLY
- The configuration window will close automatically

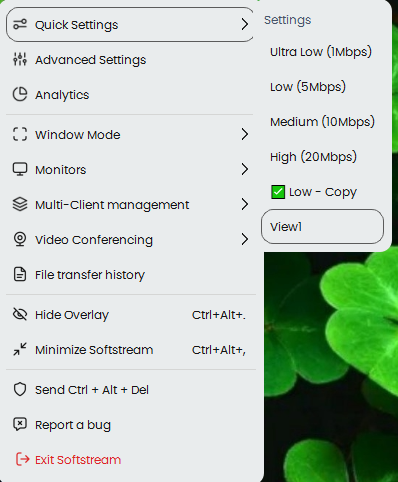
- Enable the New View Setting
- Open the Softdrive menu again
- Select Quick Settings
- Choose the newly created profile (example: View1)
- Verify the Setting Persists
- Ensure the new profile remains selected each time you connect to Softdrive
Expected Result
The Windows Snipping Tool functions normally inside the Softdrive virtual machine after switching to the Software encoder profile.
Troubleshooting
- Ensure the new view setting is selected after reconnecting
- Restart the Softdrive session after applying changes
- Verify the encoder type is set to Software (Beta)
- If the issue persists, test creating a second custom profile
- Contact support@softdrive.co if the problem continues