Overview
This tutorial walks through the Windows Configuration Designer (WCD) wizard to create a Windows provisioning package (.PPKG) that can be applied during imaging or first boot (OOBE) to automatically configure and enroll a device. The steps below correspond exactly to the wizard screens shown when selecting Provision desktop devices.
Prerequisites
- A Windows PC to build the package.
- Tenant requirements:
- Entra ID join is allowed for users (or device join is permitted by policy).
- If you want Intune enrollment: Intune licensing and auto-enrollment are enabled.
Index
- Install Windows Configuration Designer
- Create a new provisioning project
- Set up device
- Account management
- Finish – Build the provisioning package
Content
1) Install Windows Configuration Designer
- Open your browser and go to the official Microsoft ADK page:
https://learn.microsoft.com/en-us/windows-hardware/get-started/adk-install - Download
adksetup.exethe latest version that matches your Windows version (Windows 10 vs Windows 11). - Install it.
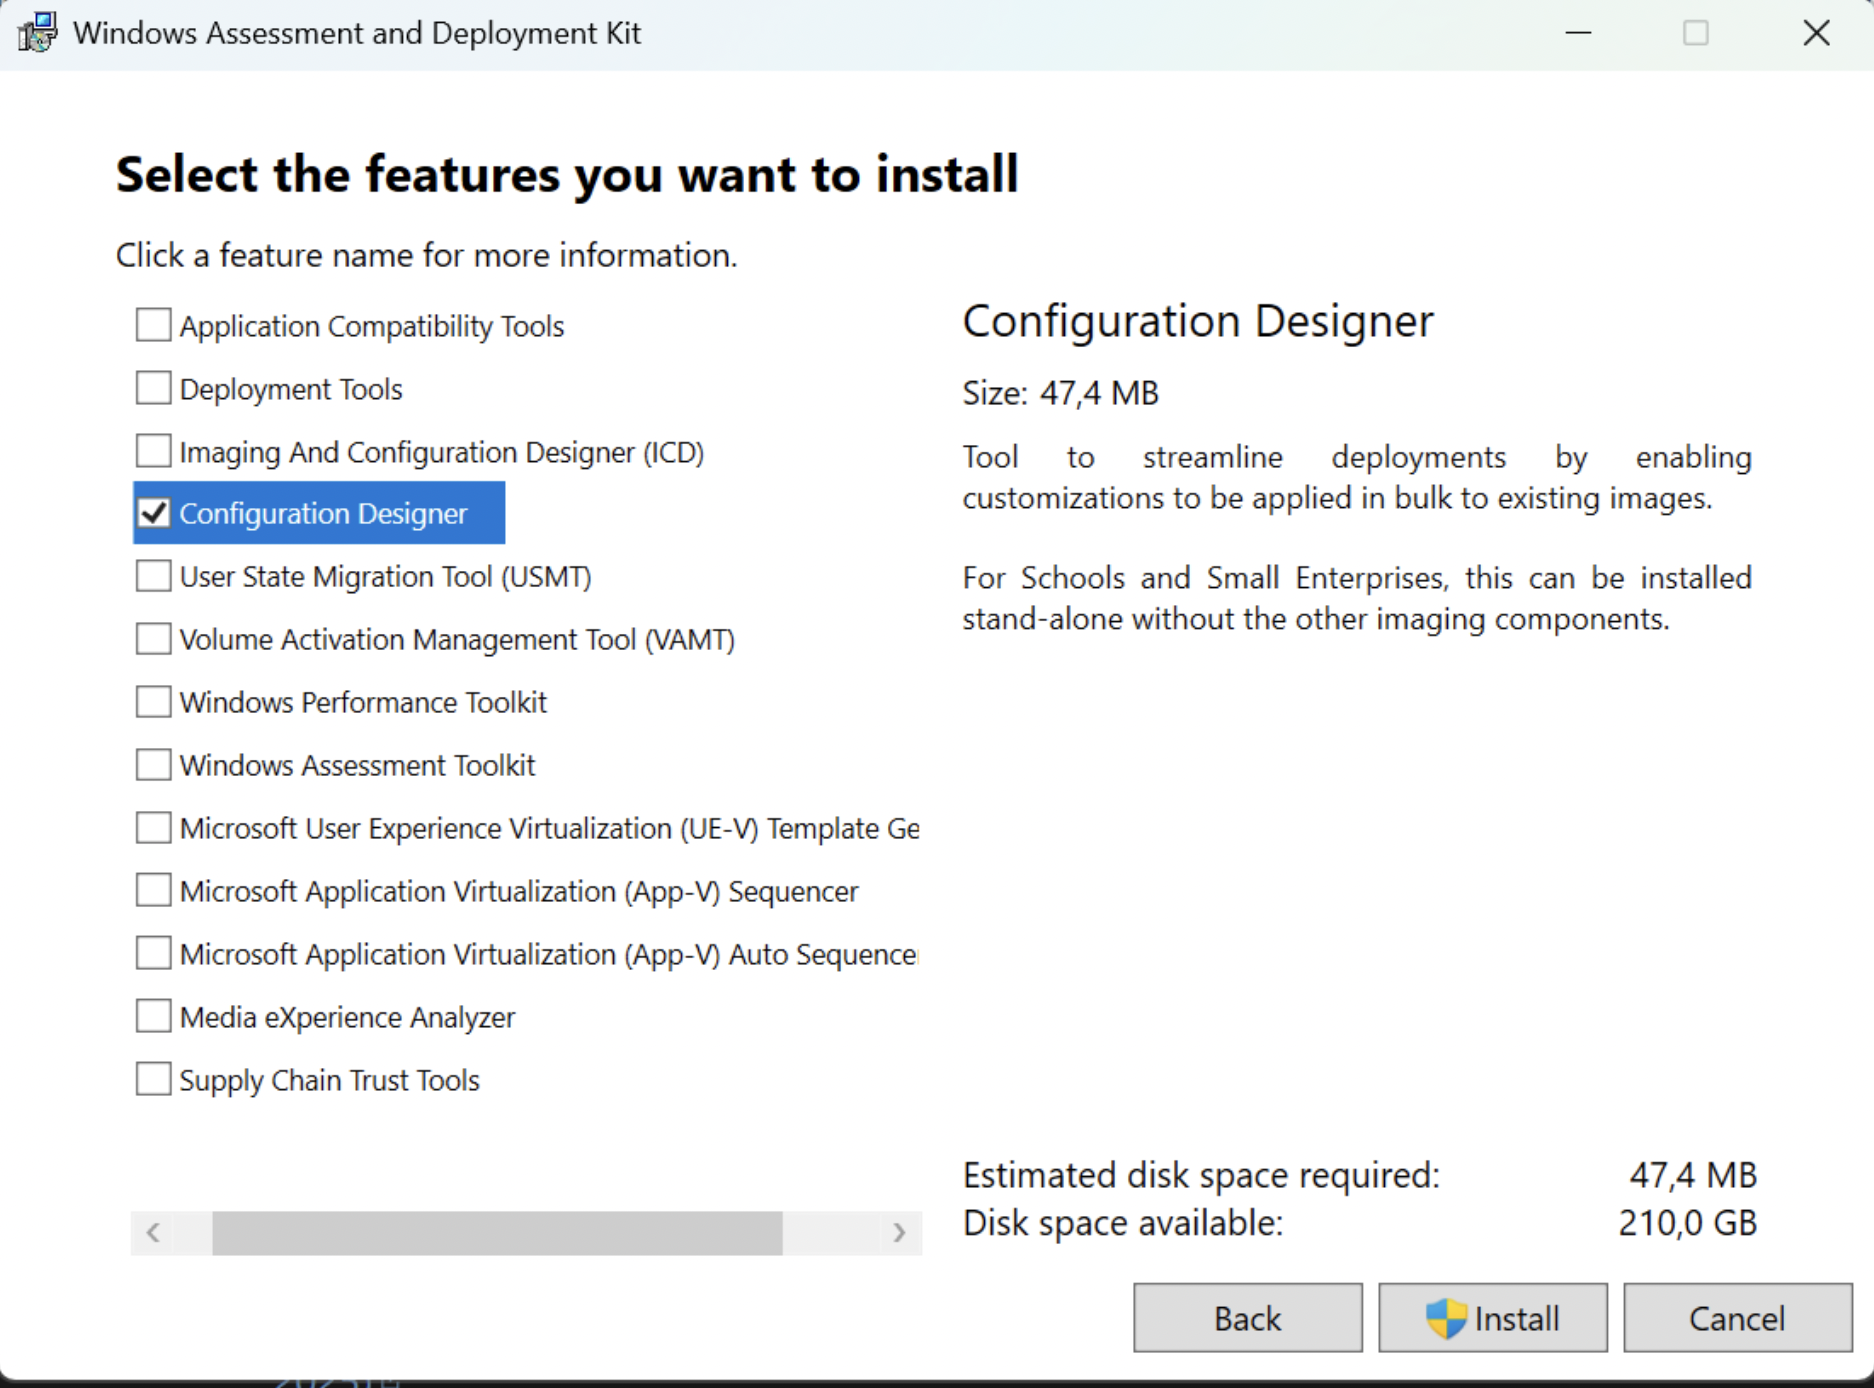
- On the “Select the features you want to install” screen select Windows Configuration Designer
2) Create a new provisioning project
- Open Windows Configuration Designer.
- Click Provision desktop devices.
 Make sure your Windows Configuration Designer has these options menu, other versions will not provide the expected results.
- Give your project a name (example:
AutoJoin-Entra-Intune). - Click Next until you reach the main editor.
3) Set up device
This step defines basic device identity and behavior.
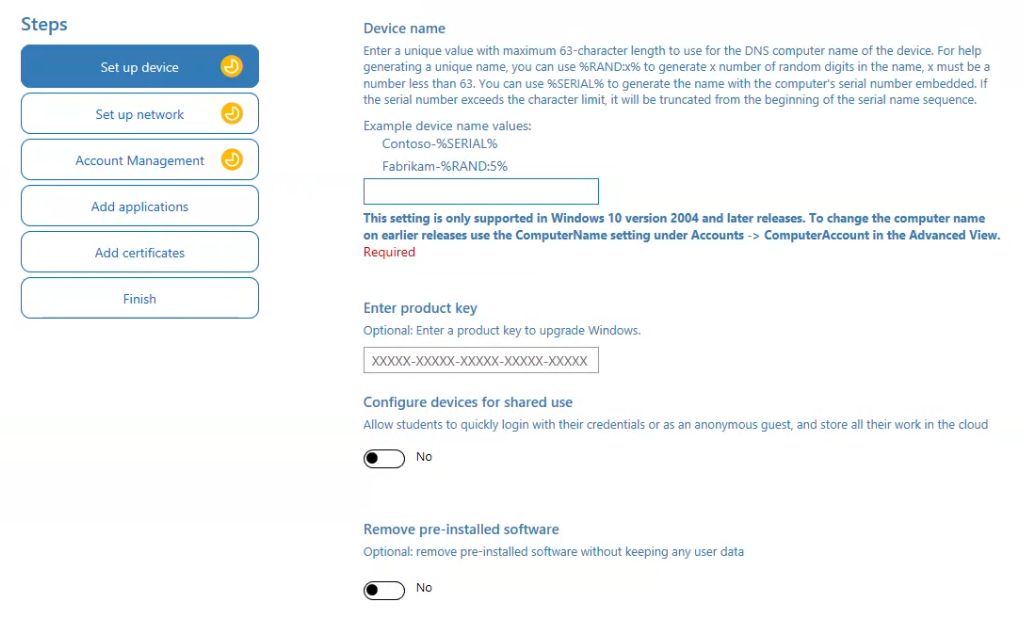
Device name (Required)
Enter a device name or naming pattern.
You can use variables to automatically generate unique names:
%SERIAL%– Uses the device serial number%RAND:x%– Generatesxrandom digits
Examples:
COMP-%SERIAL%VDI-%RAND:5%SOFTDRIVE-%RAND:6%
Device names must be 63 characters or fewer and are supported on Windows 10 version 2004 and later.
Enter product key (Optional)
Use this field only if you need to:
- Upgrade Windows edition (for example, Home → Pro)
- Apply a MAK or retail key
If your image is already licensed or uses subscription-based activation, you can leave this blank.
Configure devices for shared use
Toggle Yes only if this is a:
- Shared PC
- Kiosk
- Classroom or lab device
For most corporate laptops, VMs, or VDI images, leave this set to No.
4) Account management
This step controls identity and enrollment.
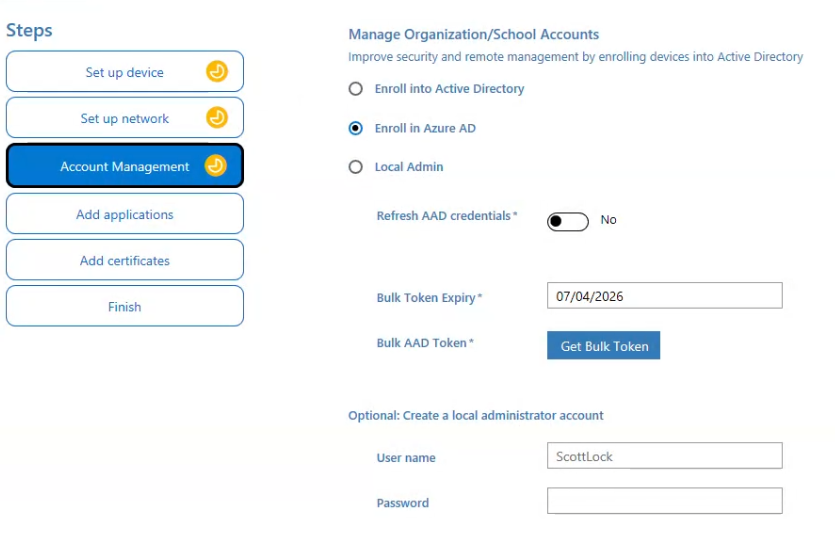
Enroll in Azure AD (Microsoft Entra ID)
Enable Azure AD Join to automatically join the device to your tenant.
You may be prompted to:
- Sign in with an enrollment or admin account.
- Provide tenant information.
This allows the device to:
- Join Entra ID during OOBE.
- Skip manual user-based join.
5) Finish – Build the provisioning package
Package settings
- Owner: IT Admin
- Version: Start with
1.0
Security
Choose one:
- Sign the package (recommended)
- Or protect with a password
Signing improves trust and prevents tampering.
Click Build to generate the .ppkg file.
Embedded in an image
The package can be:
- Stored with the image
- Applied during first boot using scripts or recovery customization folders