Overview
This guide outlines two methods for creating templates in Softdrive, which can streamline virtual machine deployment:
Prerequisites
- Access to the Softdrive Dashboard (Softnet).
- Method 1 (Upload OS image): You must have a Softdrive administrator account to submit the image.
- Method 2 (Save a machine as template):
- Create a computer from an existing Softdrive template or use an existing Softdrive computer that you have configured
- Signed in as a Local Administrator on the Softdrive machine.
- Back up any important data stored on the machine.
- Windows is fully updated.
- The computer is not previously joined to a Domain, Intune, or Azure AD.
- All required applications installed before starting.
- If applicable, confirm required drivers/tools are installed:
- Virtio-win-guest-tools (see Install Drivers and Guest Agent )
- Confirm BitLocker is disabled before creating the image/template (see Disable BitLocker )
Index
- Method 1: Upload OS Images
- Method 2: Prepare a Softdrive machine and save it as a template
- Additional Notes
Content
Method 1: Upload OS Images
Log in to the Softdrive Dashboard
- Go to: https://softnet.softdrive.co/
- Log in with administrator or user credentials.
Navigate to Templates
- Click More, then select Templates.
- Select Create in the top-right corner.


Fill out the Template form
- Complete the form based on your requirements.
- Attach the image file in .qcow2 or .vmdk format.
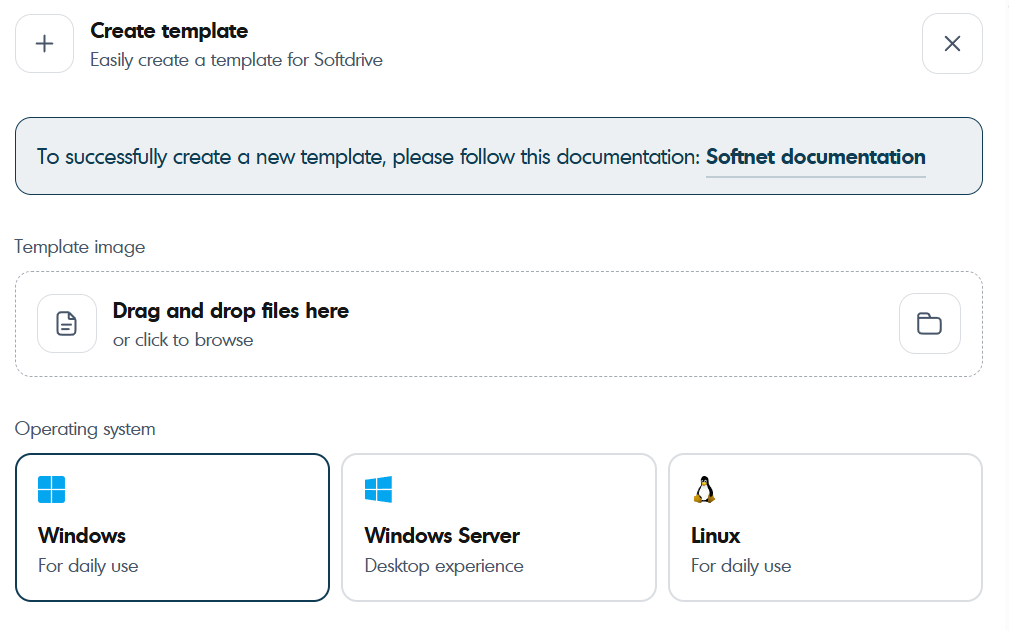

Click Create Template
- You will receive an email within 24 hours confirming the upload was processed.
Contact Support
If you have any trouble, contact support@softdrive.co.
Method 2: Prepare a Softdrive machine and save it as a template
Before beginning the technical preparation steps, you must first identify the Softdrive computer that will serve as the base for your template. This can be either a newly created computer deployed from one of the standard Softdrive templates, or an existing Softdrive computer that you have already configured and validated.
Power on the selected machine and ensure all required applications, updates, and configuration settings are installed. Confirm that the computer reflects the desired “gold image” state, as it will be used to deploy future desktops. Once the machine is fully prepared and tested, proceed with the steps below to prepare it for template conversion.
Disable BitLocker
- Open an elevated PowerShell or CMDand run:
manage-bde -status - If BitLocker is ON for C:, turn it off:
manage-bde -off C: - Wait until full decryption completes.Check progress with:
Do not run Sysprep until decryption is 100% complete.manage-bde -status

Clean up the system (Optional but recommended)
Open Command Prompt and run:
cleanmgr /sagerun:1- Remove unused user accounts and files.
- Optionally, run third-party cleanup utilities.
Remove provisioned Appx package
Appx packages can block Sysprep if they exist for a user but are not provisioned system-wide.
Run this in PowerShell as Administrator:
# Remove from current user:
Get-AppxPackage -Name Microsoft.WidgetsPlatformRuntime | Remove-AppxPackage -ErrorAction SilentlyContinue

# Remove provisioned copy (if any):
Get-AppxProvisionedPackage -Online |
  Where-Object {$_.DisplayName -like "*Microsoft.WidgetsPlatformRuntime*"} |
  ForEach-Object { Remove-AppxProvisionedPackage -Online -PackageName $_.PackageName }
Retry Sysprep afterward.
Run Sysprep
Run:
C:\Windows\System32\Sysprep\sysprep.exeIn the Sysprep window, choose:

System Cleanup Action: Enter system Out-of-Box Experience (OOBE)Generalize: Removes unique system-specific info (like SIDs)Shutdown Options: Shuts down the system after preparation (important)
After this point the PC will shut down.
Set the machine as a template
- Go to the Softnet Dashboard.
- Navigate to Computers and find the machine that was sysprepped.

- Click the computer and select "Save as Template".

This will notify Softdrive to complete the template creation process. Please do not turn the PC on until you receive a confirmation email from support@softdrive.co.
First boot after Sysprep
- On next boot, Windows will show the OOBE setup screen.
- Proceed manually, or it will auto-enroll if Autopilot is configured.
Additional Notes
- Make sure to encrypt the machine once it has been templated so it can be used.