By default, all computer within a tenant belong to the same network, so by enabling Network Discovery and sharing all computers should be able to see each other and share files/folders.
This is done in three steps:
- Enable Network discovery/File sharing on all machines
- Configure a shared folder on the main machine which will work as a file server.
- Map drives on client machines
Enable Network discovery/File sharing on end devices
- Open Settings
- Select Network & Internet
- Select Advanced network settings
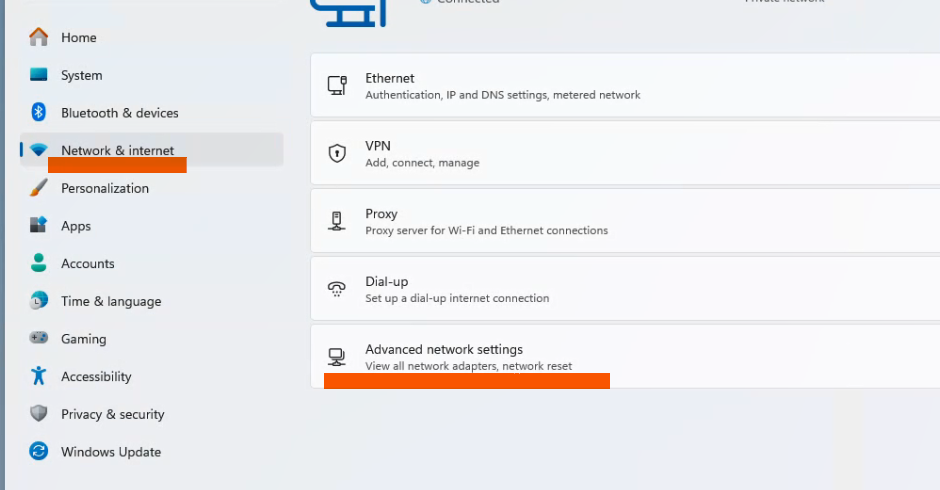
- Select Advanced sharing settings

- Expand the desired network profiles, such as Private networks or Public networks
- Select the button next to Network discovery to turn it ON
- Select the button net to File and printer sharing to turn it ON

- Click Save changes
9) Confirm your pc's are in a workgroup by seeing them in the network tab of the Windows explorer.

Configure a shared folder on the main machine which will work as a file server.
On the main machine we will create a shared folder.
1) Go to windows explorer, choose the folder that will be the shared folder. It can be located directly in the C drive
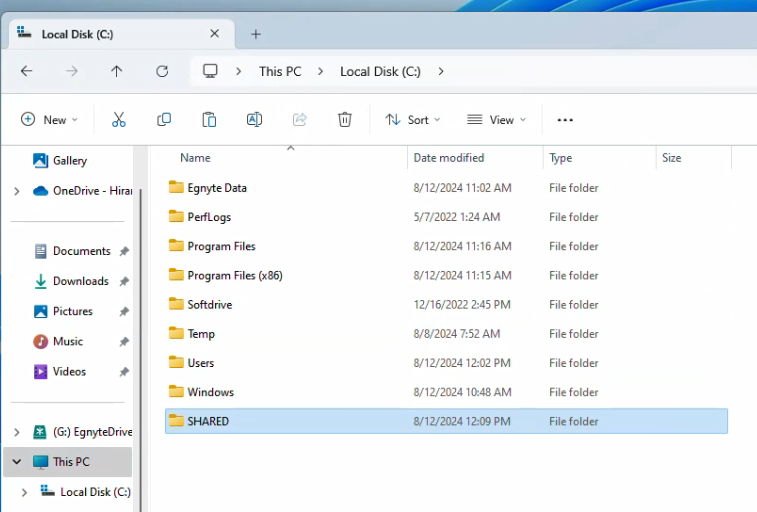
2) Right-click and choose properties, go to the security tab
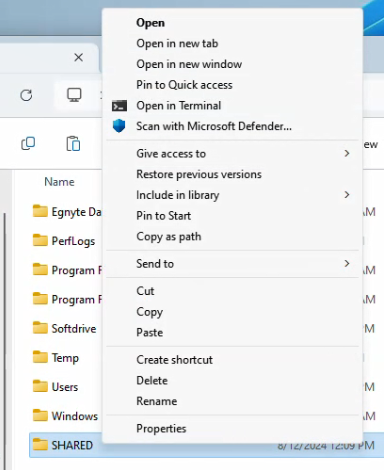
3) Choose "Advanced"

4) On the permissions windows click Add
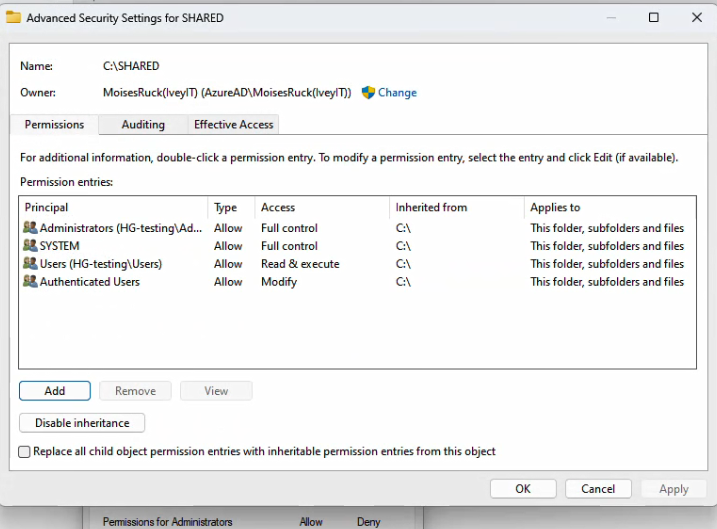
5) Depending on level of security choose the permissions needed. In this example we will just provide all permissions to the users "Everyone". This set up is ideal for groups of 4 to 8 computers, for more computers a solution like Azure active directory can be used.
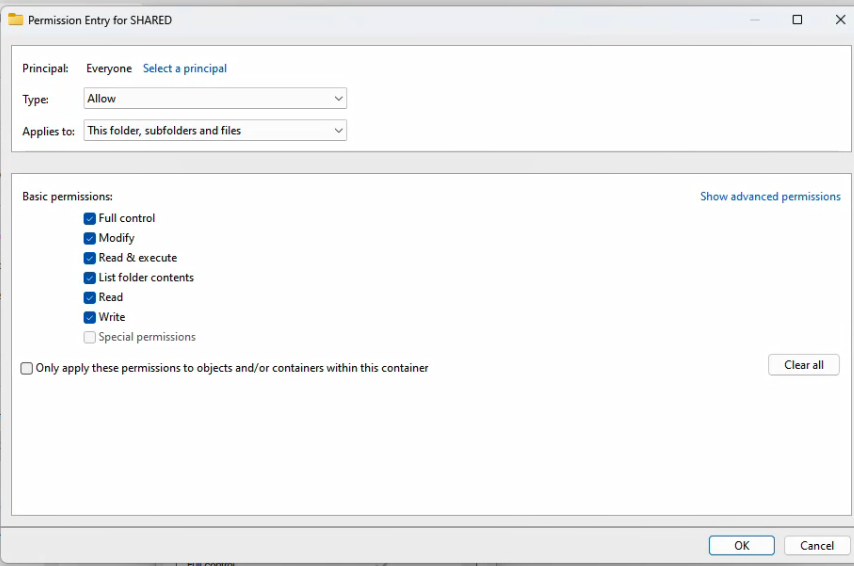
6) Hit OK

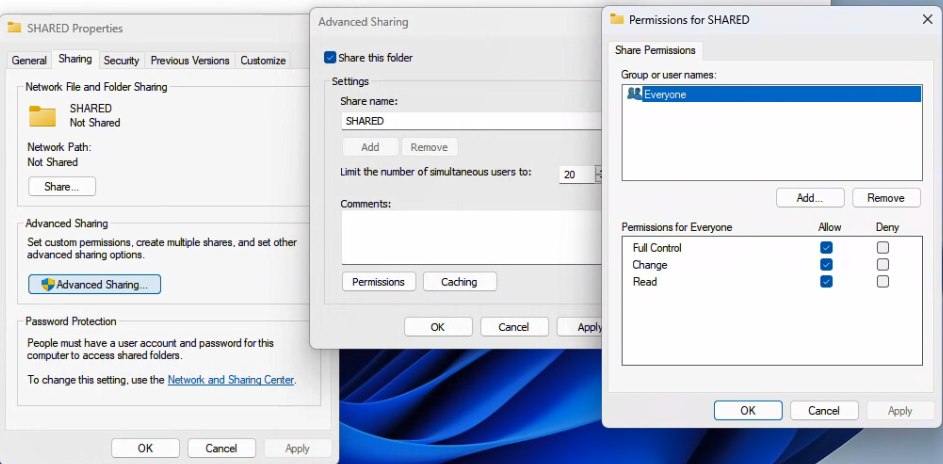
7) Once security settings have been applied on the NTFS level, you con proceed to SHARE the folder, on the same window, go to SHARING tab and click choose "Advanced sharing"
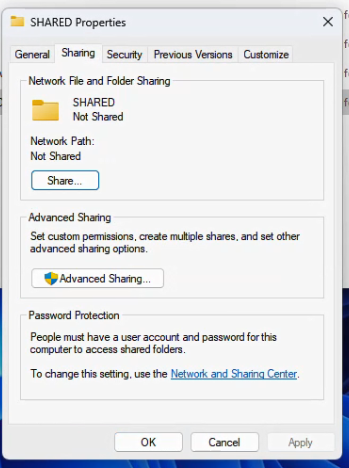
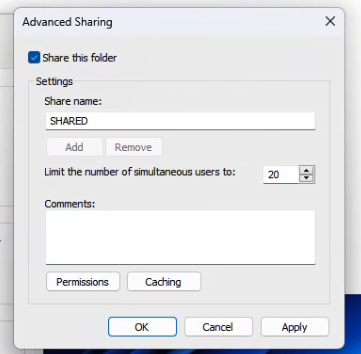
8) Check on "Share this folder" and then click on "Permissions"
9) In the permissions tab assign all permissions needed to the everyone user.
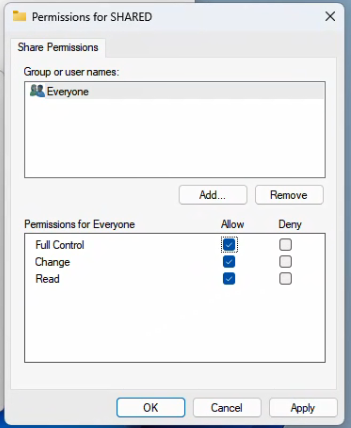
other users can be assigned if needed.
10) Close all those three windows
Map drives on client machines
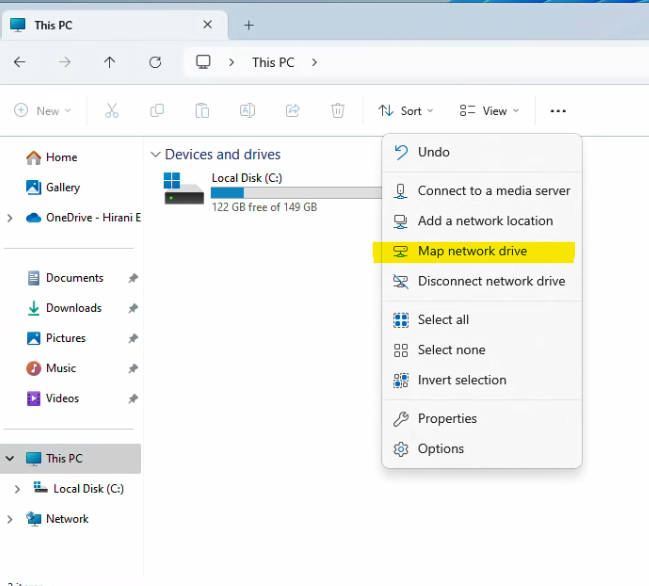
1) Once file explorer ➝ Go to THIS PC ➝ click on the *** menu and choose "Map network drive"
2) Fill up the folder name with this info
\\"PCNAME"\"Shared folder name", in this example would be \\PC-testing\Shared
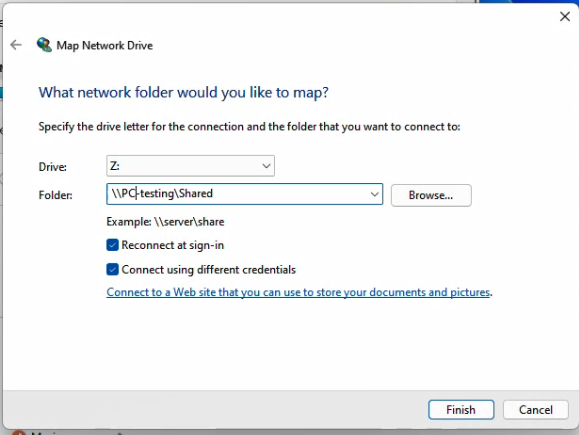
Make sure the two last checkboxes are checked then hit next.
3) In the window that pops up, fill the login information for machine that will act as file server.

4) Once that is done, the shared drive should be there available.

Was this article helpful?
That’s Great!
Thank you for your feedback
Sorry! We couldn't be helpful
Thank you for your feedback
Feedback sent
We appreciate your effort and will try to fix the article