Overview
This guide explains how to configure Okta Single Sign-On (SSO) for Softdrive, including creating the application in Okta, configuring it in Softdrive, and logging in using Okta credentials.
Prerequisites
- Administrator access to your Okta tenant
- Access to the Softdrive Dashboard
Procedure
- Create an App Integration in Okta
You will first need to create an application in Okta to allow Softdrive to authenticate users through your identity provider.
- Go to your Okta admin portal:
https://<your-okta-domain>.okta.com/admin - Log in with your administrator credentials
- Navigate to Applications → Applications
- Click Create App Integration
- Configure the application:
Sign-in method: OIDC – OpenID Connect
Application type: Web Application
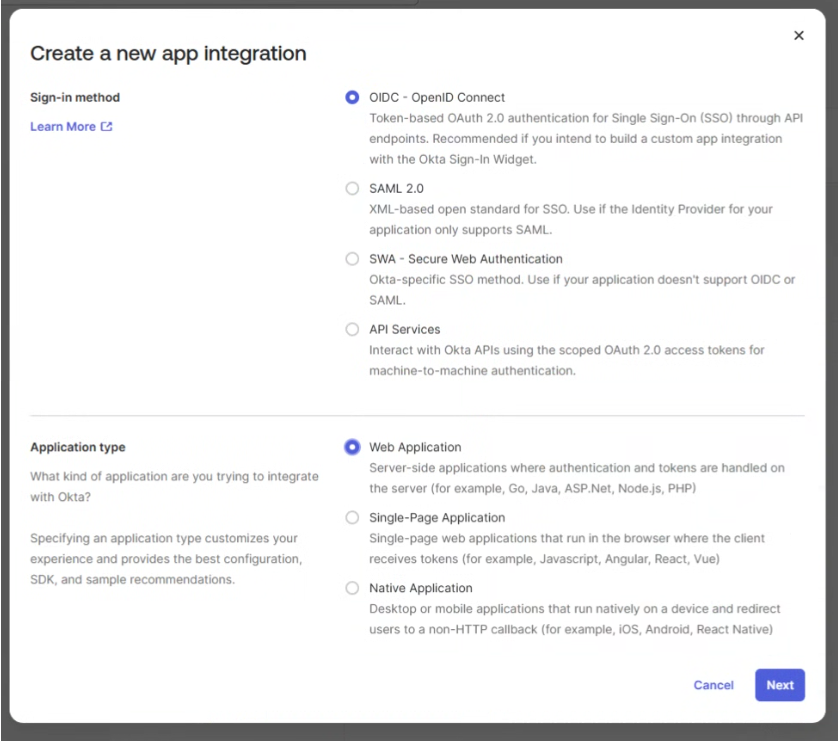
- Click Next
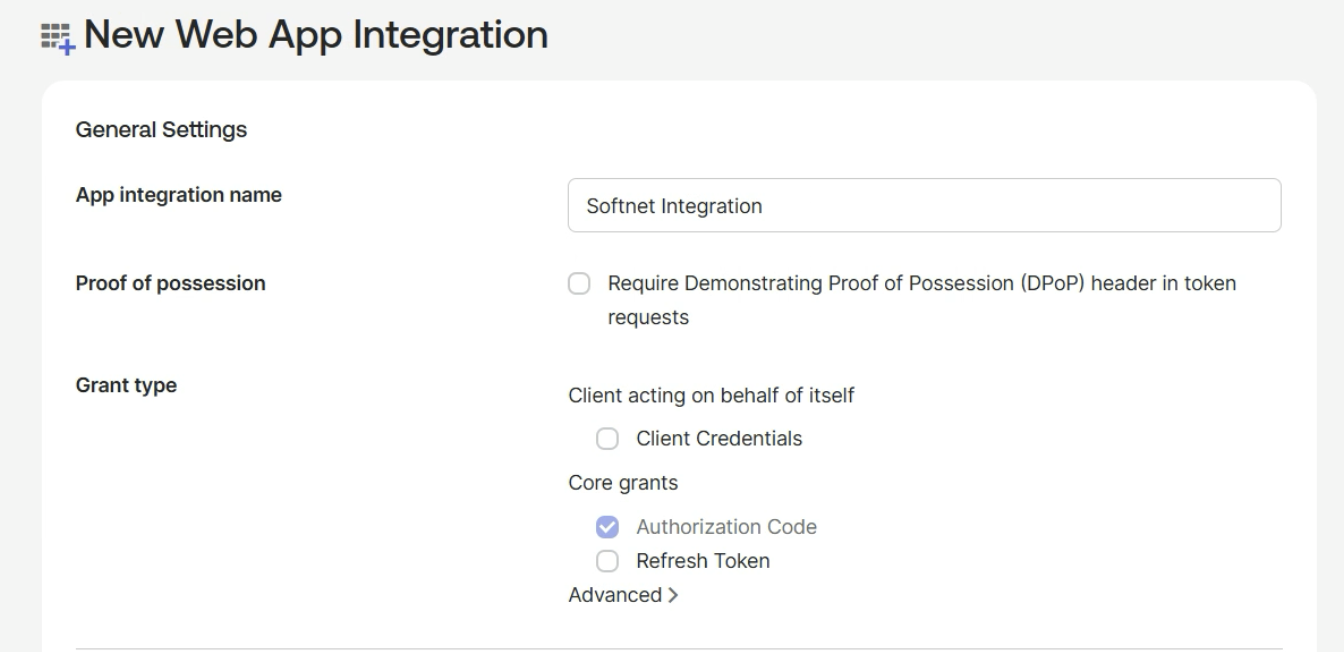
- Configure the app settings:
- App Name (example: "Softdrive Integration")
- Grant Type: Authorization Code
- Set the Sign-in Redirect URI:
https://softnet.softdrive.co/auth/okta/callback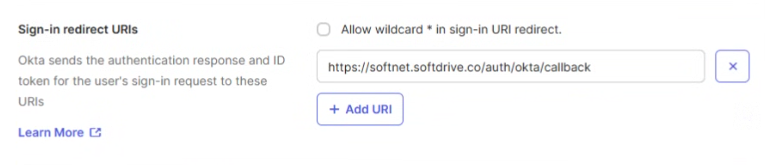
- (Optional) Set the Sign-out Redirect URI:
https://softnet.softdrive.co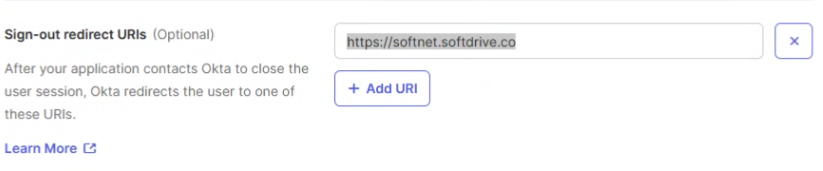
- Assign users to the application:
- Go to the Assignments tab
- Click Assign → Assign to People or Groups
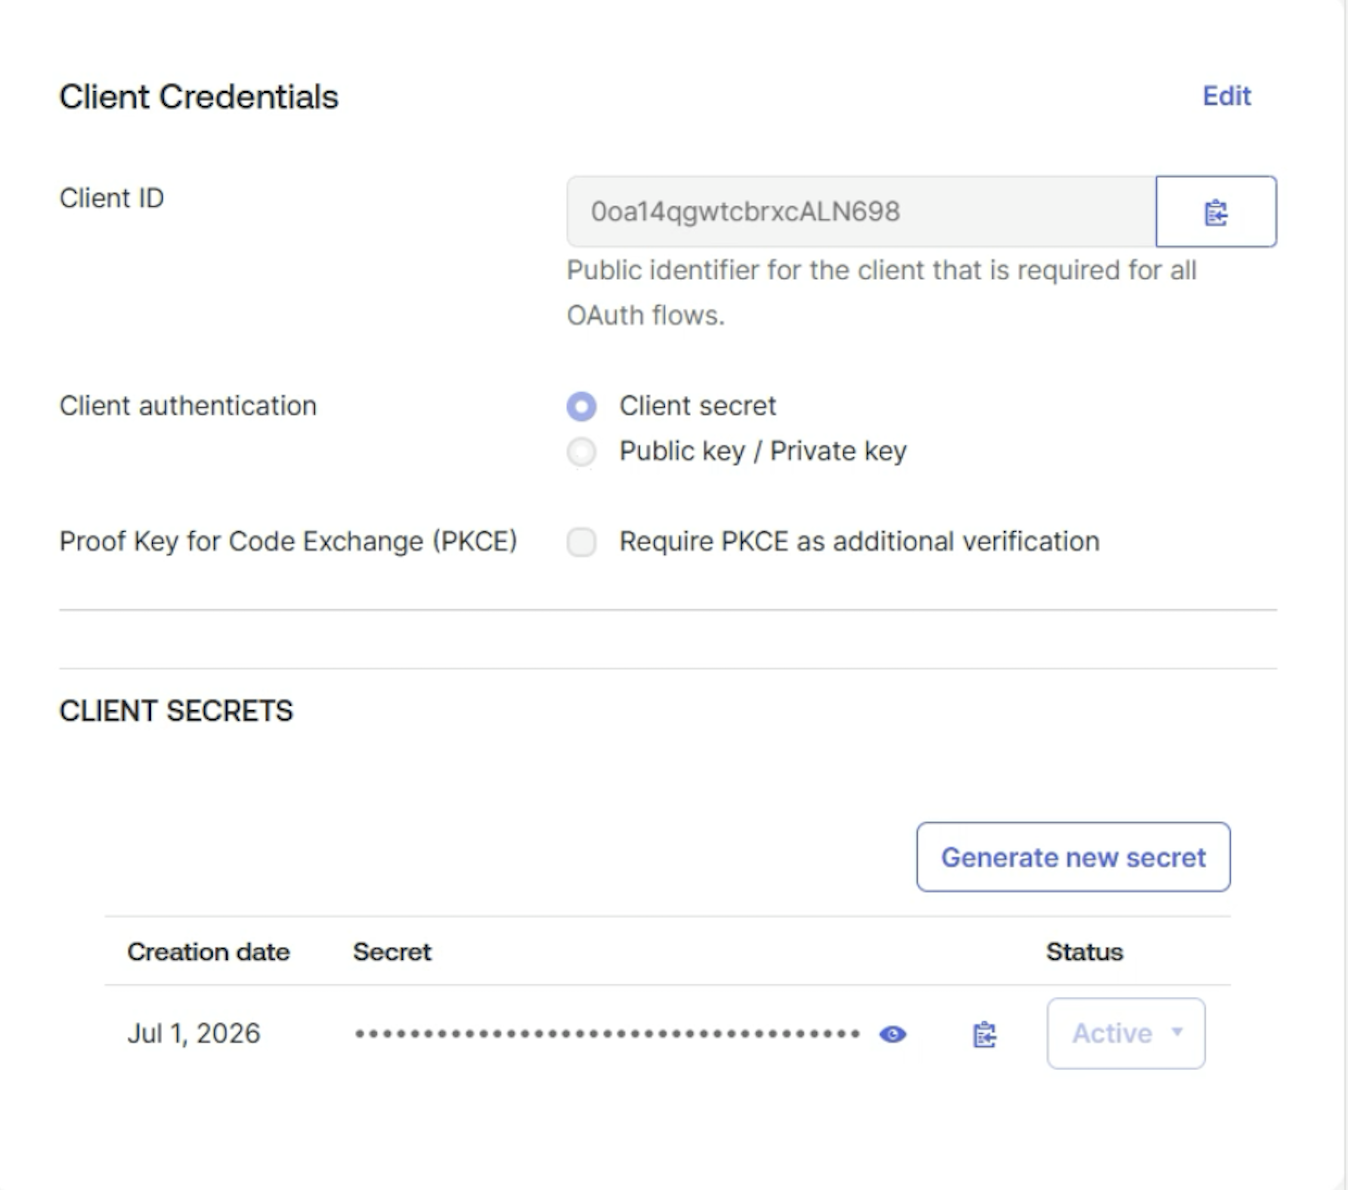
- Once saved you will be given the ID and the Client secret. Copy the Client ID and Client Secret
- Go to your Okta admin portal:
- Configure Okta in Softdrive
After creating the app in Okta, you must configure the integration in the Softdrive Dashboard.- Log in to:
https://dashboard.softdrive.co/ - Navigate to Security → Authentication
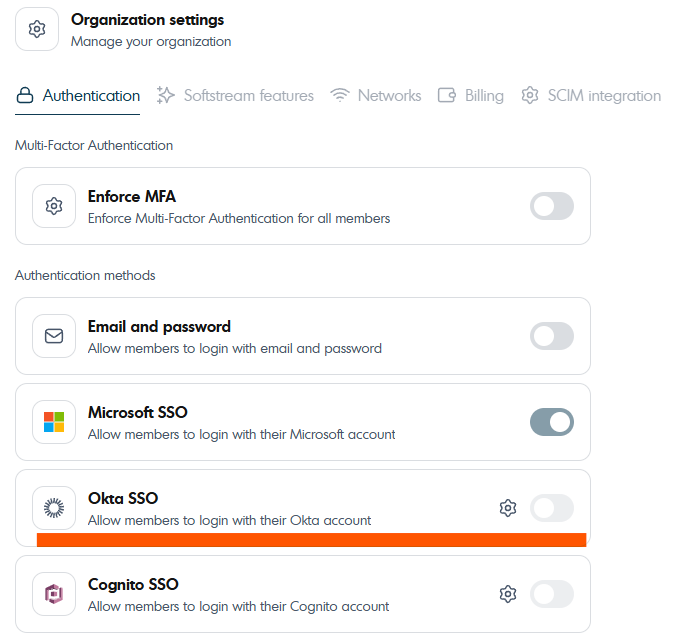
- Click the gear icon under Okta SSO
- Enter the Client ID, Client Secret, Domain, and User Info URL
- Click Save Configuration and enable Okta SSO
- Log in to:
- Log in with Okta
Once configured, users can log in to Softdrive using their Okta credentials.
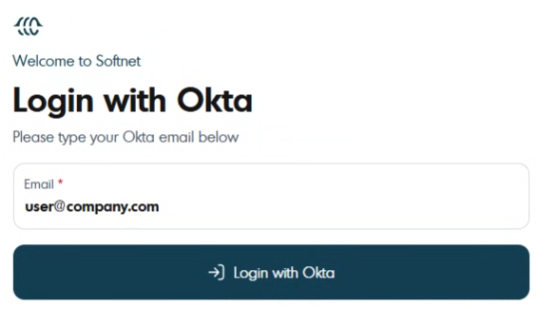
- On the login screen, select Okta

- Enter your email and click Login with Okta
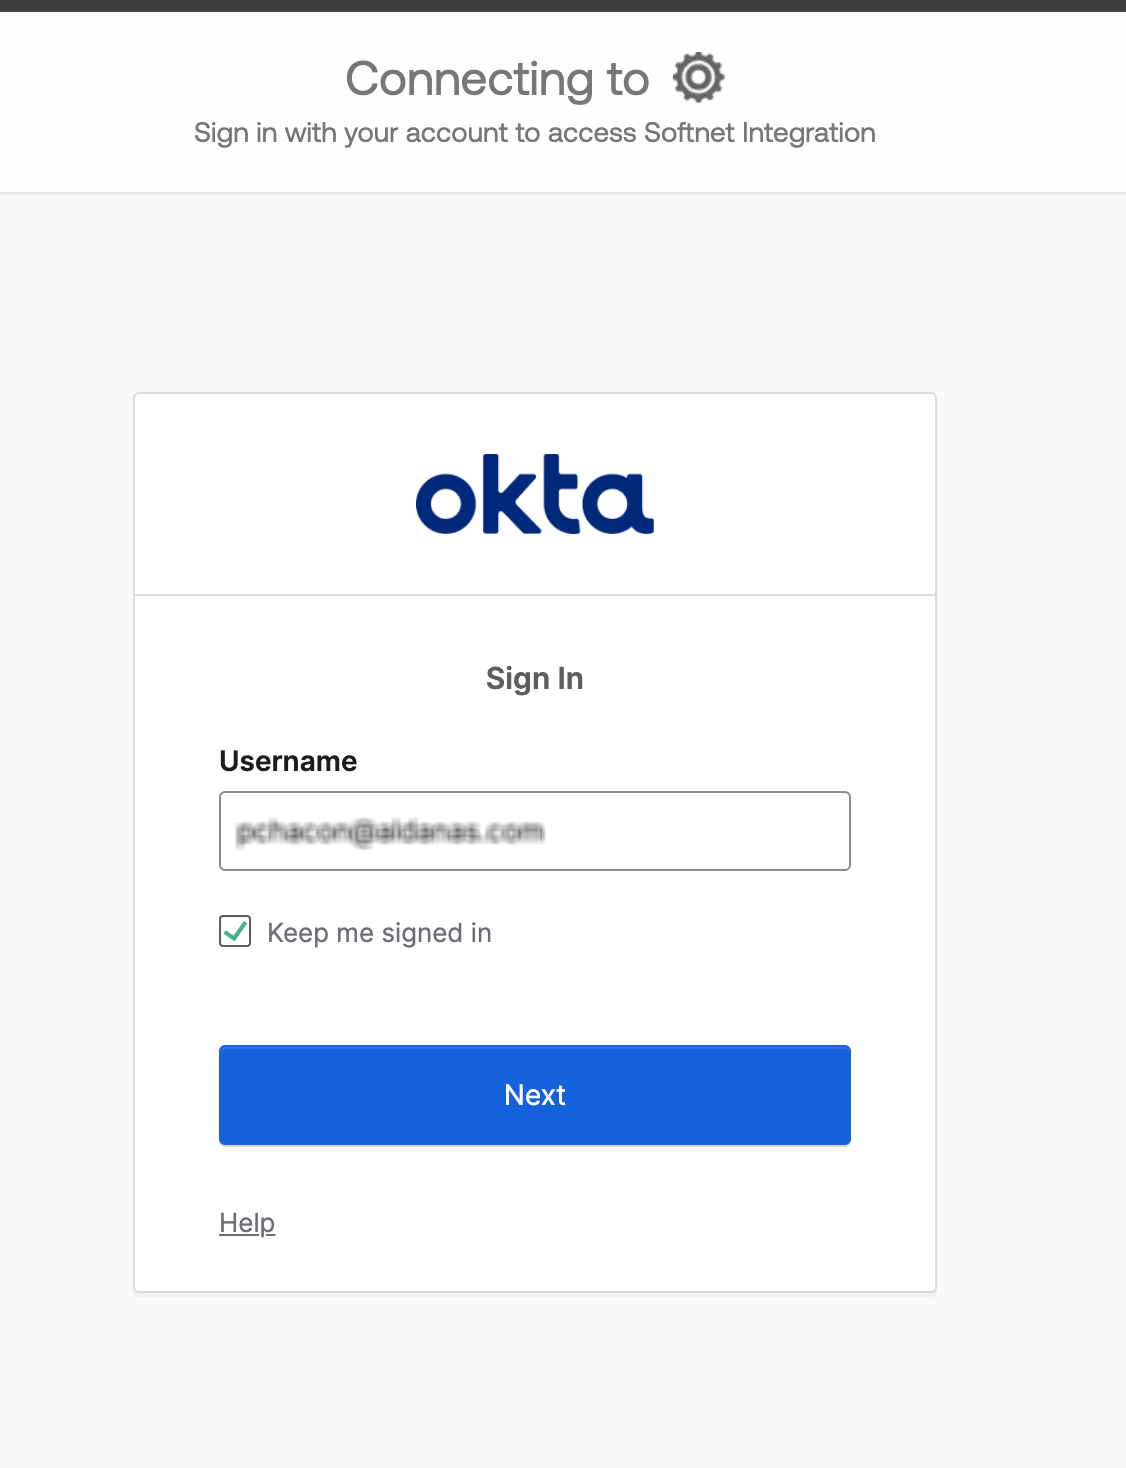
- This will redirect you to an Okta login page. Authenticate using your Okta credentials
- On the login screen, select Okta
Expected Result
Users can successfully authenticate into Softdrive using Okta SSO.
Troubleshooting
- Verify redirect URIs are configured correctly in Okta
- Ensure Client ID and Secret match between Okta and Softdrive
- Confirm users are assigned to the Okta application
- If issues persist, contact support@softdrive.co